This is the second Dale Tiffany lamp to come in over the past few months. They are wonderful lamps to repair because the construction is predictable and well done and the glass is dense and colorful. This lamp was damaged in a move even though it was securely packed. The big challenge for this repair was finding matching glass. That's always my first priority, to find glass which is a match, to minimize the evidence of the repair. I managed to find matches after approaching four suppliers. Here's the process. (Click on any photo to enlarge).
Here is how the lamp came to me. It was clearly hit very hard on the one corner, causing the two corner pieces to crack and the metal channel around the border to buckle.
A piece of the red iridescent glass on the side also sustained a crack.
In order to repair a lamp, it necessary to completely remove the cracked pieces, usually one at a time. Here I've scored the red glass with the pistol grip cutter and am tapping on the back of the glass to break it out.
The tapping causes the glass to split into shards which I remove with needle-nose pliers.
Once the cracked glass is all removed, I use the pliers to pull off the old solder and copper foil around the edge of the piece.
Then I slide a piece of manila folder beneath the opening and I trace a pattern from which to cut a new piece of glass.
Below, I've outlined the pattern onto the red glass and scored it straight across from one side of the sheet of glass to the other. Here I'm tapping on the score line to "loosen" the glass so it will split in a straight line. Once it splits, I simply score and snap apart the piece needed for the repair.
After the piece is cut, I grind it with my grinder. The grinding wheel is wet with the sponge as shown, which draws up water from the reservoir beneath the cutting surface.
After the piece is rinsed and dried, I apply adhesive copper foil to the center of the edges, all around the new piece of glass.
Then I press the foil onto the sides and edges of the glass using a flexible plastic wand or "fid."
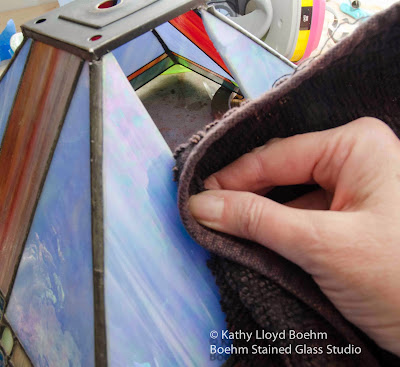
To prepare the space for the new glass, I first spray it with cleaner and rub off any old adhesive with an old towel.
The replacement piece of glass is then laid into the dome. To prepare it for soldering, I'm applying liquid flux to the copper foil using a metal acid brush.
And here's the newly replaced piece after its been soldered. After the inside of the dome is soldered, I rest the lamp in a large box of packing peanuts and solder the outside of the dome.
The blue piece adjacent to the red had a small crack which turned out to be more of an issue than I first thought. Fortunately, I had a good match for the glass in my inventory. Below, I've used the same techniques as above and cracked out the blue piece.
Here's the new piece of blue, copper foiled and ready for soldering.
Frequently throughout the repair process, I clean the soldering iron by rubbing in on a block of sal ammoniac. I'm always wearing a protective breathing mask during the soldering process.
Below, I'm taking Novacan brand Black Patina from the bottle cap and brushing it onto the silver solder. It immediately turns it black. After it sits for a few minutes, I spray-clean off the excess and then let it dry to prepare for waxing.
Moving onto the border. below I've removed one of the cracked turquoise glass corner pieces.
And now with some coaxing, the old metal channel comes off too.
Here's the replacement piece of glass, foiled and ready for soldering.
One corner piece done, one to go.
The other cracked corner piece is removed and copper foil is applied to the surrounding edges.
Trying the pattern on for size. Its a good fit.
And here's the second corner piece, soldered in place.
Now all of the cracked pieces have been replaced and the old, bent metal channel framing has been removed from two sides of the lamp. Below, my husband Eric is custom-cutting a length of new channel to snap onto the sides.
He presses the channel down onto the glass and secures it temporarily with painter's tape. Then I solder it to the inside of the lamp dome for a neat finish. Once the soldering is complete, I apply black patina to the new framing material, let it dry and then apply wax to the entire finished lamp.
And here it is, back in service, and ready to give its owner many more years of enjoyment! Thank you very much Warren for finding me online. It was a pleasure meeting you and repairing your beautiful lamp!
Another view ..
Please visit my website to see my custom windows and repairs (click here). And if you are on FaceBook, become a fan and I'll keep you up to date on all my stained glass projects. Call me any time at 201-600-1616 or email with your questions. Thanks!


No comments:
Post a Comment