The view of the front door from the inside of the home showing where the side lights are located.
Another view of the original side light.
Here is my design for the duplicates. I followed the same proportions.
The pattern making process .. Tracing the markings on the "cartoon" onto Manila folders using carbon paper. The layers are tacked to my work surface with push pins to prevent shifting.
After the pattern pieces are traced, they are cut using stained glass shears, shown on the left. These are double-bladed and cut out a thin piece of paper which allows for the copper foil which will follow later. To the right are standard scissors, used to cut the outer border of the pattern.
Now the pattern pieces have been cut. Many have been organized into recycled envelopes as shown.
After looking through several examples of clear glass, my customer made a nice choice, clear waterglass cut in a vertical orientation. Rather than do just clear for the diamonds and triangles, we decided that a nice green would work well with the exterior of the home and the furnishings. I had a large sheet of hand-blown green glass which was given to me by a gentleman who was giving up his stained glass hobby. The glass is a medium shade with lovely bubbles throughout. Thank you again, Mr. Johnson, I hope you see your glass being put to good use. It was the ideal choice for this project!
Below, I'm using a pistol grip cutter to score the outline of a piece of clear waterglass.
After the score is made, I snap it off using these blue "running pliers".
A few pieces of the green traced and cut. After each piece is cut, I grind the edges in a grinder. This is to assure safe handling and also to promote the adhesion of the copper foil.
My husband Eric sets up a fence or "jig" around the borders of each side light. This is to ensure that the cut pieces do not shift. Here he's verifying the measurements.
Now all of the glass for both side lights has been cut and laid on the cartoon.
I remove each piece, one at a time, and apply black back copper foil as shown, to the center of the edge of each piece.
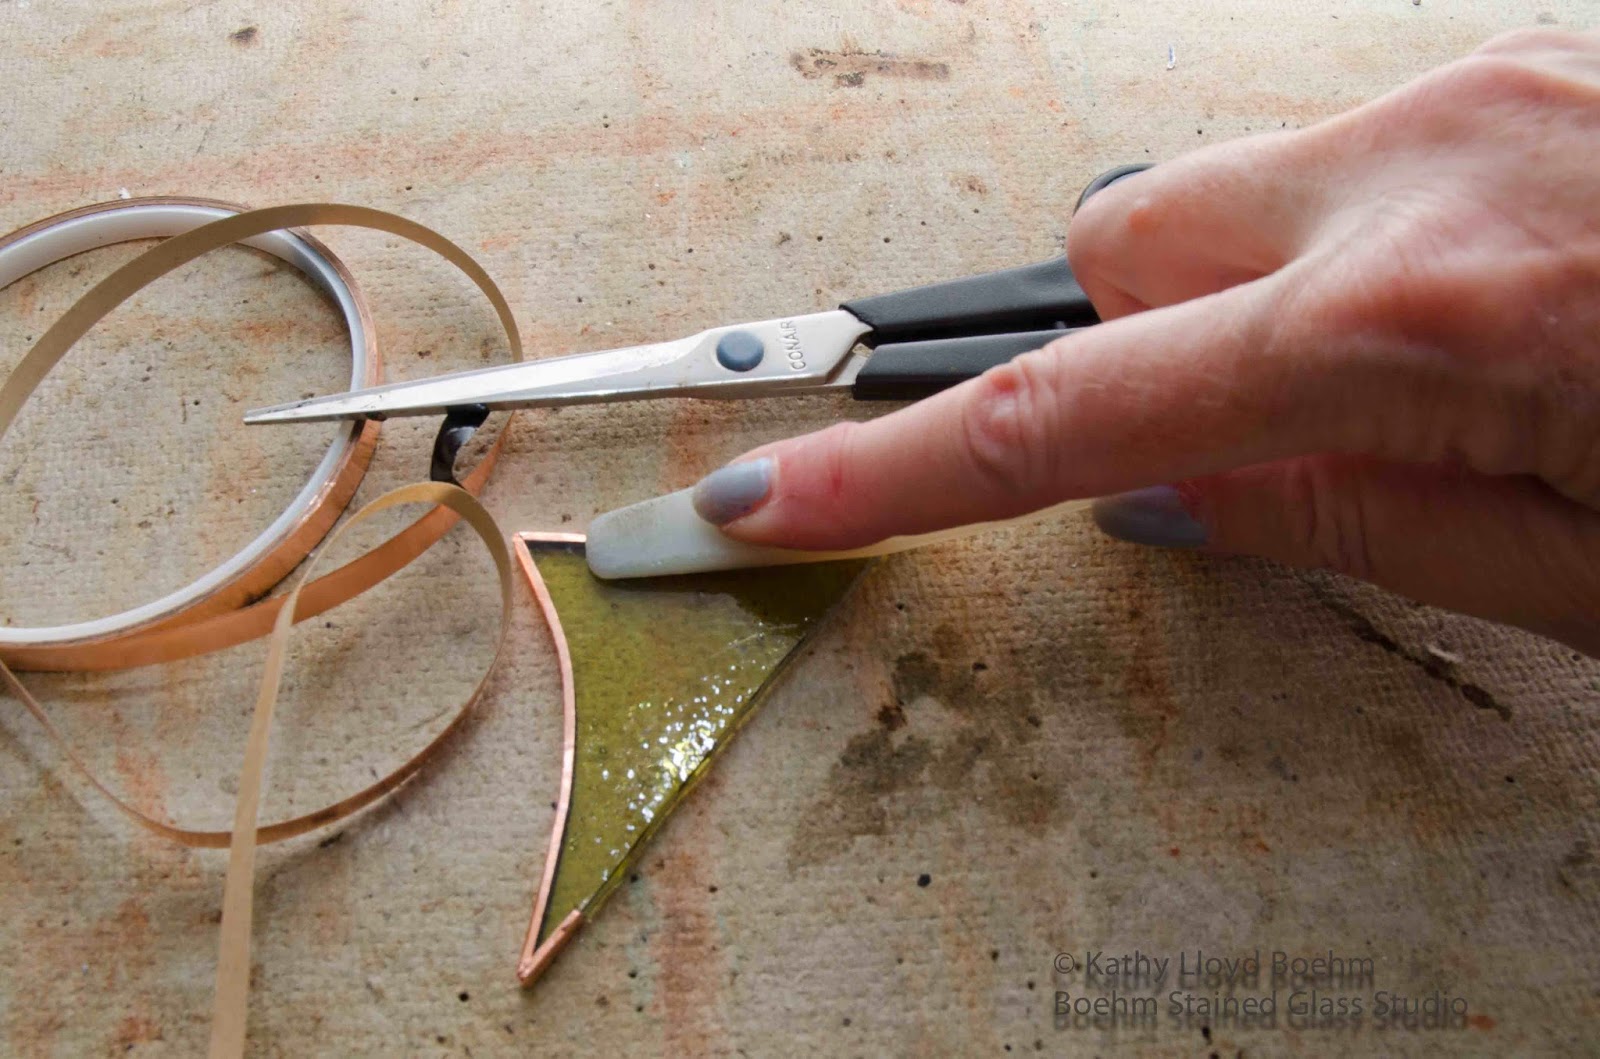
Using a "fid" or flexible plastic wand, I press the copper foil onto the glass.
Now all of the glass has been copper foiled.
Next, using a metal acid brush, I apply Blu-Glass Liquid Flux to the copper foil. This is an agent which allows for the soldering.
Next I "tack-solder" the pieces as shown below. I apply a dot of solder to the intersections of the pieces and at key points throughout the panel.
After tack soldering is complete, I remove the "jig" and slide out the cartoon. This protects the cartoon from damage from the chemicals which follow.
Now I've fully soldered the front of each panel.
Next, I spray "Kwik-Clean Stained Glass Flux & Patina Cleaner" to the solder. Then I towel it off and allow it to dry.
My husband Eric is shown here cutting the angle for a mitered corner of the metal frame, which is made of zinc.
Here, Eric is placing the metal jig back onto the panel. This time, its to hold the frame in place. He'll do this for all four sides of each panel.
Below, I've fluxed and soldered the mitered corners. I've also soldered all the lines to the frame. This gives added strength to the overall panel.
After I've cleaned off the flux again with Kwik-Clean, I apply Novacan Black Patina to the zinc frame and to the soldered lines as shown. To prevent contamination of the supply, I take patina from the bottle cap and discard whatever is not used from the cap.
Another cleaning with Kwik-Clean spray, and the panels are almost ready.
Here they are, side by side after the patina has been applied.
I applied Liva Stained Glass Polish to both sides of both panels. I propped them up to dry.
And here is one of the two completed panels, ready for installation. It is resting in a custom-made holder that Eric made for me.
Thank you so much Janice, for calling us in to replace your side lights. It was a pleasure creating them for you. We can't wait for you to see them "in person"!
Please visit my website to see my custom windows and repairs (click here). And if you are on FaceBook, become a fan and I'll keep you up to date on all my stained glass projects. Call me any time at 201-600-1616 or email with your questions. Thanks!


No comments:
Post a Comment